Step by Step Guide, Setting up your website layout
Precondition
You have installed opera-project skeleton using the Quick Start Guide
Goal
In this guide we will:
- add the assets of the bootstrap template exemple to our project
- create a base template
- learn how to split a layout into areas that will contain blocks
- create two layout: a single column and a two column. Each having a template and a database entry
- see how to add twig blocks to differents area of different page in the admin
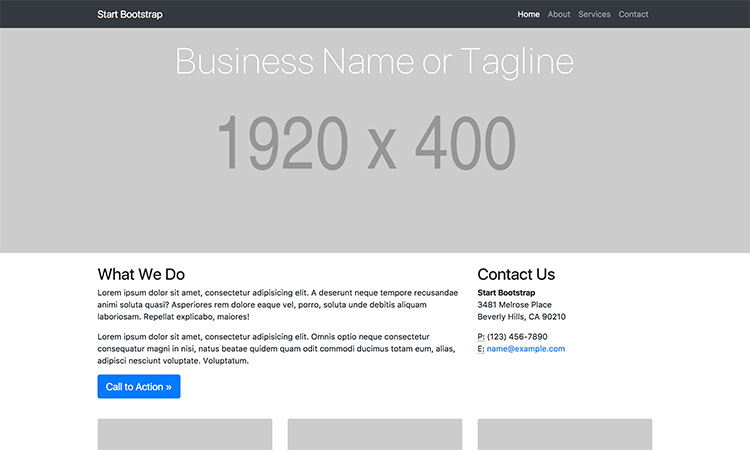
For this guide I’m going to take an existing simple bootstrap template and convert it into opera layout.
A single column page layout :
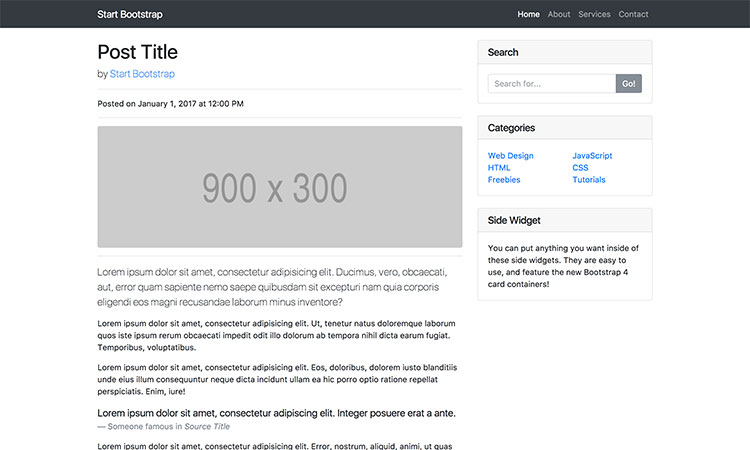
A two column page layout :
ZIPFILE/css/
        |____business-frontpage.css                 (layout css file)
ZIPFILE/index.html                                  (single column default layout)
ZIPFILE/index2.html                                 (two column layout)
ZIPFILE/vendor/
        |____bootstrap
             |____css
                  |____ bootstrap
                        |____ bootstrap.min.css     (bootstrap css file)
Add the Assets
Unzip the file and copy the css/ and vendor/bootstrap/css folder’s content into the assets/css folder of your project.
Edit the /webpack.config.js to comment (or remove) the versioning and add the two css files:
// .enableVersioning(Encore.isProduction())

.addStyleEntry('css/bootstrap.min', './assets/css/bootstrap.min.css')
.addStyleEntry('css/business-frontpage', './assets/css/business-frontpage.css')
And build
$ npm i
$ npm run build
Creating the layouts
Creating the Base template twig
The file template/base.html.twig is the template every page layout will extends of.
We can copy the content of the index.html from the zip file into this template/base.html.twig file and remove the unnecessary elements: nav, header, container, and footer. All those elements will become area and blocks in the future.
Then we configure the <title> and <meta> so that it takes the title of the opera page dynamically
    <!-- old: <title>Business Frontpage - Start Bootstrap Template</title> -->
    <title>{% block title %}{{ cms_render(_opera_page.title) }}{% endblock %}</title>
    <meta name="description" content="{{ _opera_page.metaDescription }}" />
    <meta name="keywords" content="{{ _opera_page.metaKeyword }}" />
We add three twig block {% block %}: stylesheet body and javascript so that the layout extending this base.html.twig can add its code.
We add the css files:
 <link media="all" rel="stylesheet" href="{{ asset('build/css/business-frontpage.css') }}">
 <link media="all" rel="stylesheet" href="{{ asset('build/css/bootstrap.min.css') }}">
The template/base.html.twig should look like this:
<!DOCTYPE html>
<html lang="en">
  <head>
    <meta charset="utf-8">
    <meta name="viewport" content="width=device-width, initial-scale=1, shrink-to-fit=no">
    <meta name="description" content="">
    <meta name="author" content="">

    <!-- customise title and meta keywords and description automatically -->
    <title>{% block title %}{{ cms_render(_opera_page.title) }}{% endblock %}</title>
    <meta name="description" content="{{ _opera_page.metaDescription }}" />
    <meta name="keywords" content="{{ _opera_page.metaKeyword }}" />

    <!-- customise title and meta keywords and description automatically -->
    <link media="all" rel="stylesheet" href="{{ asset('build/css/business-frontpage.css') }}">
    <link media="all" rel="stylesheet" href="{{ asset('build/css/bootstrap.min.css') }}">

    {% block stylesheets %}{% endblock %}
  </head>

  <body>
    {% block body %}{% endblock %}
    {% block javascripts %}{% endblock %}
  </body>
</html>
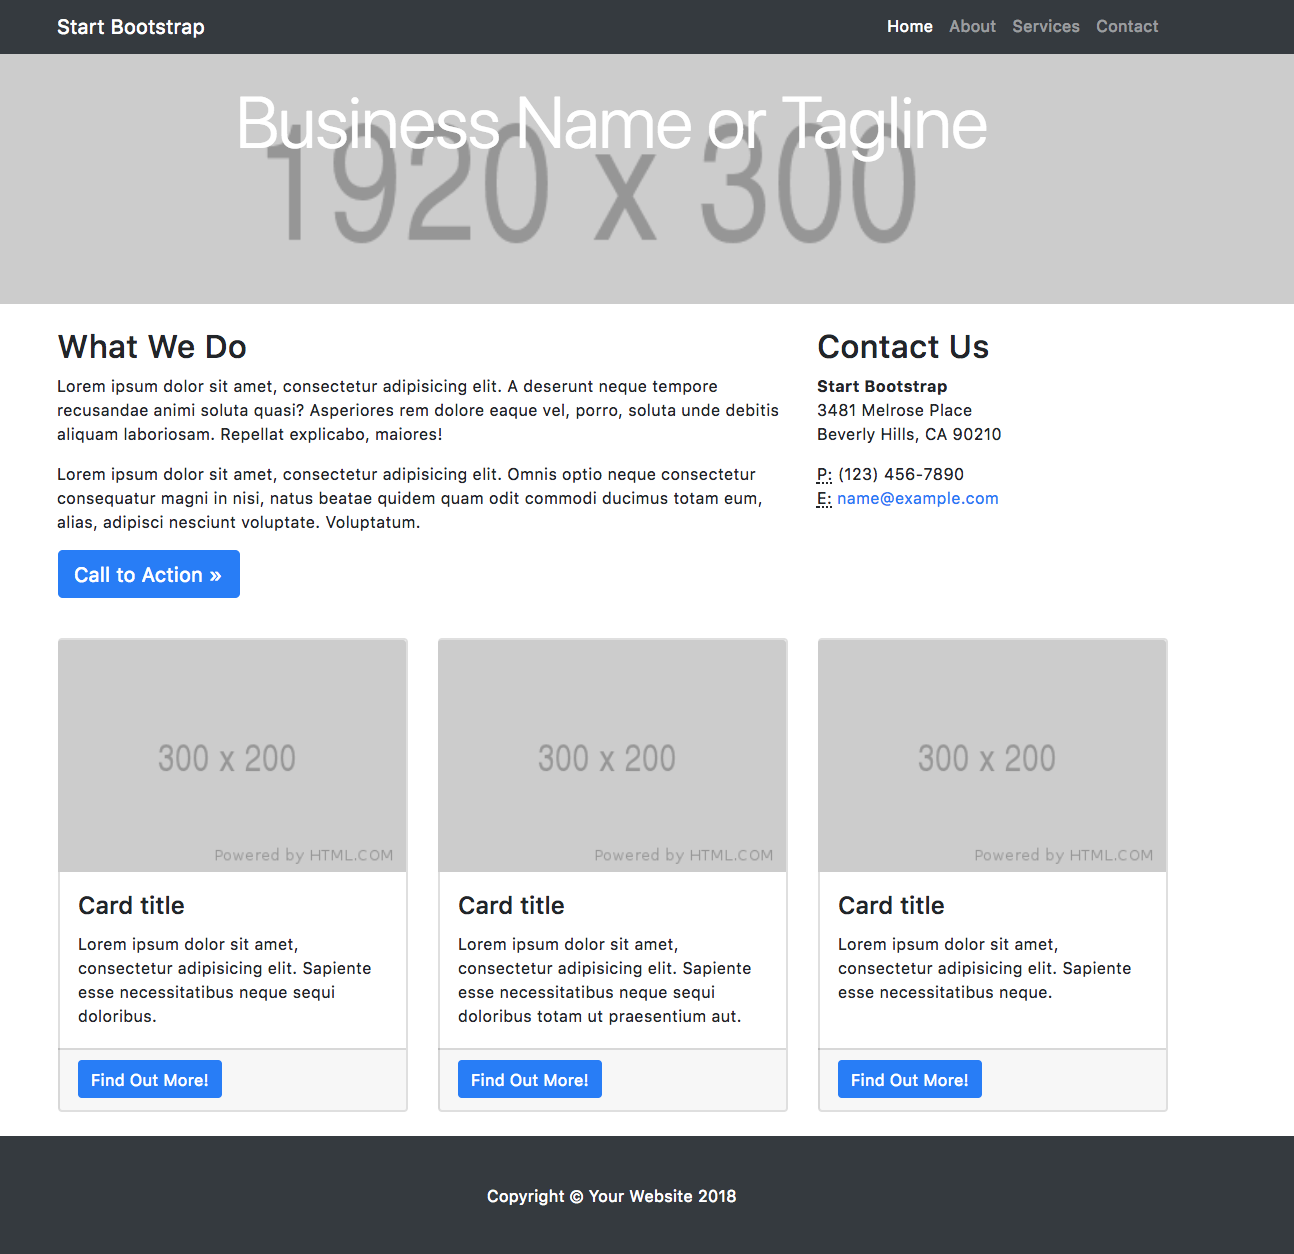
First layout: single column default layout
Splitting the first layout into area
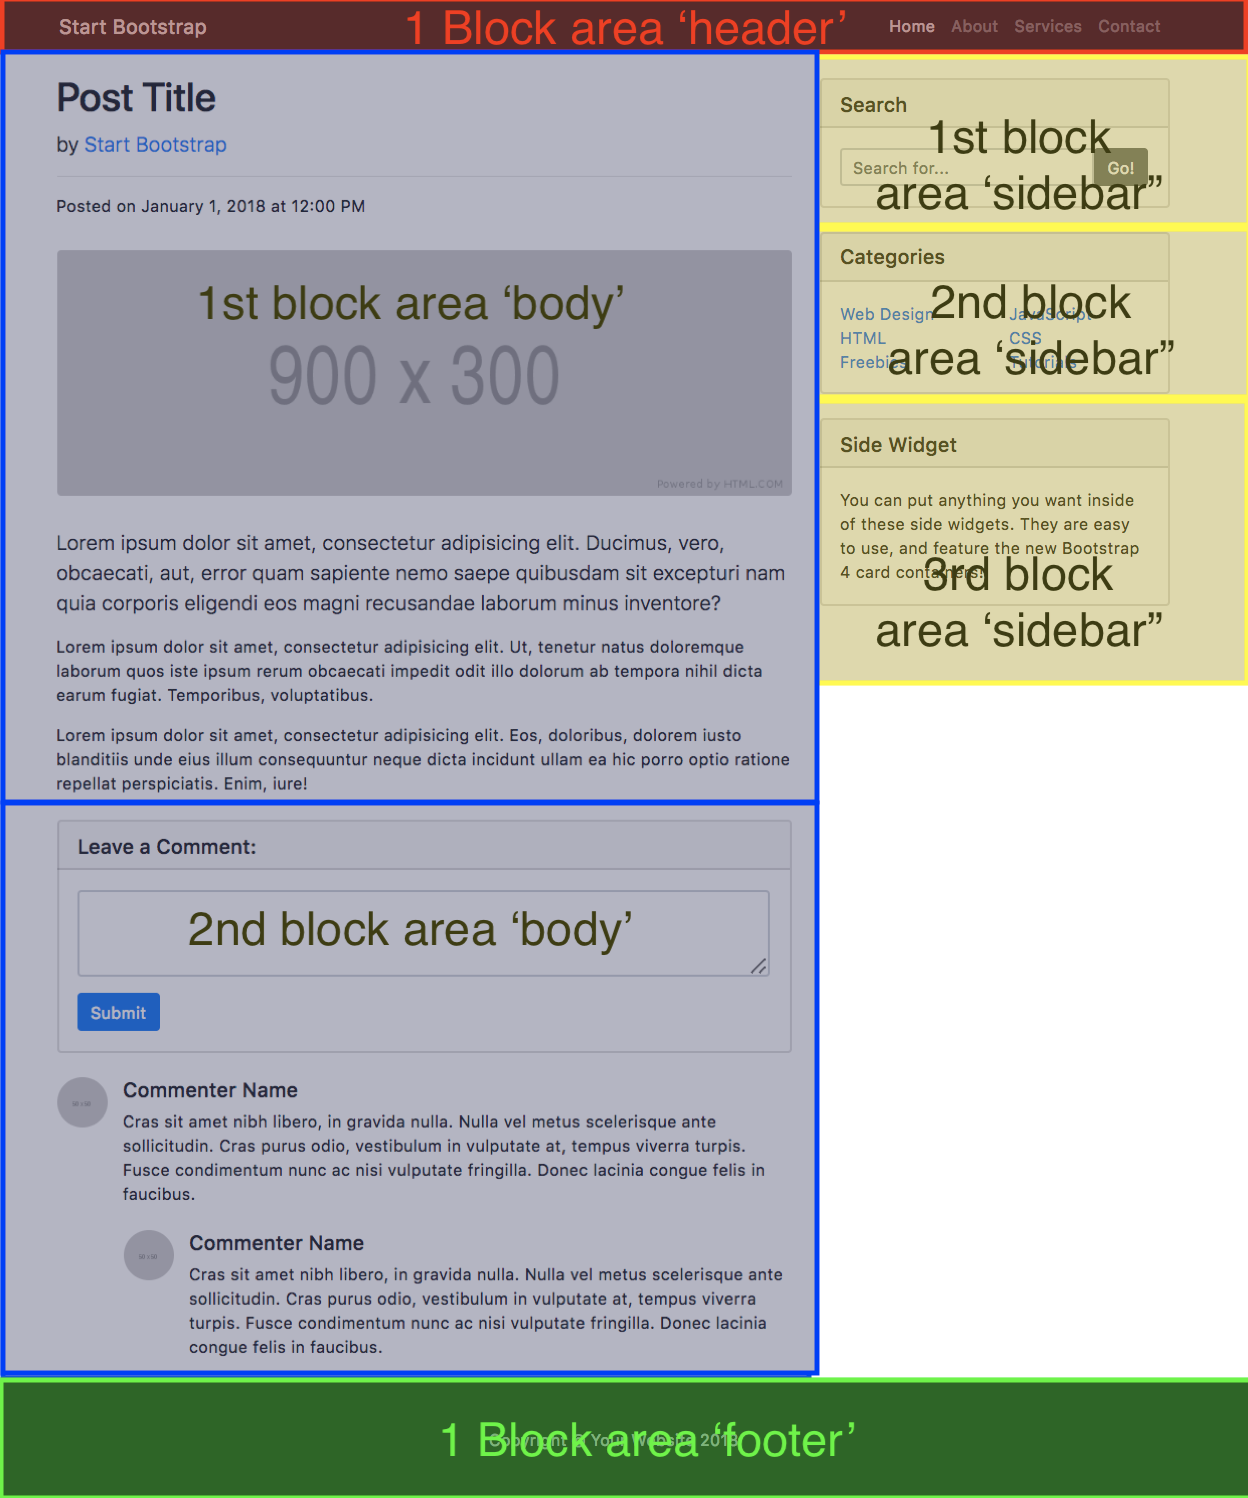
If we take our first layout:
We can divide the layout into different area header, body, footer:
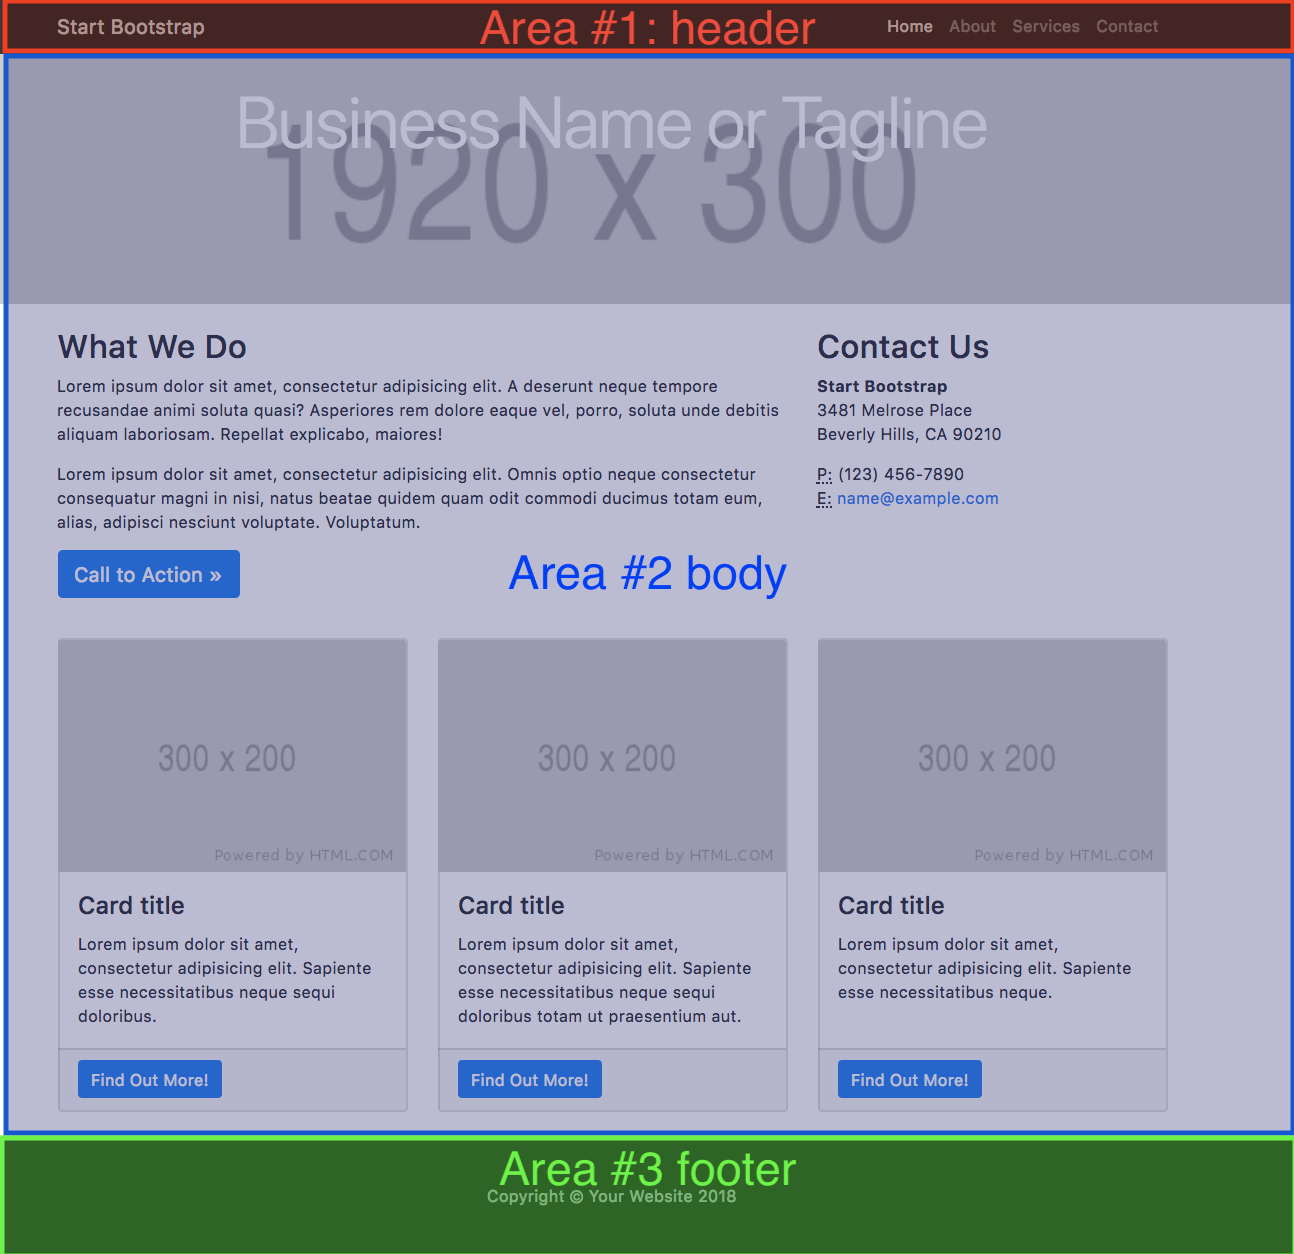
With each area having various blocks:
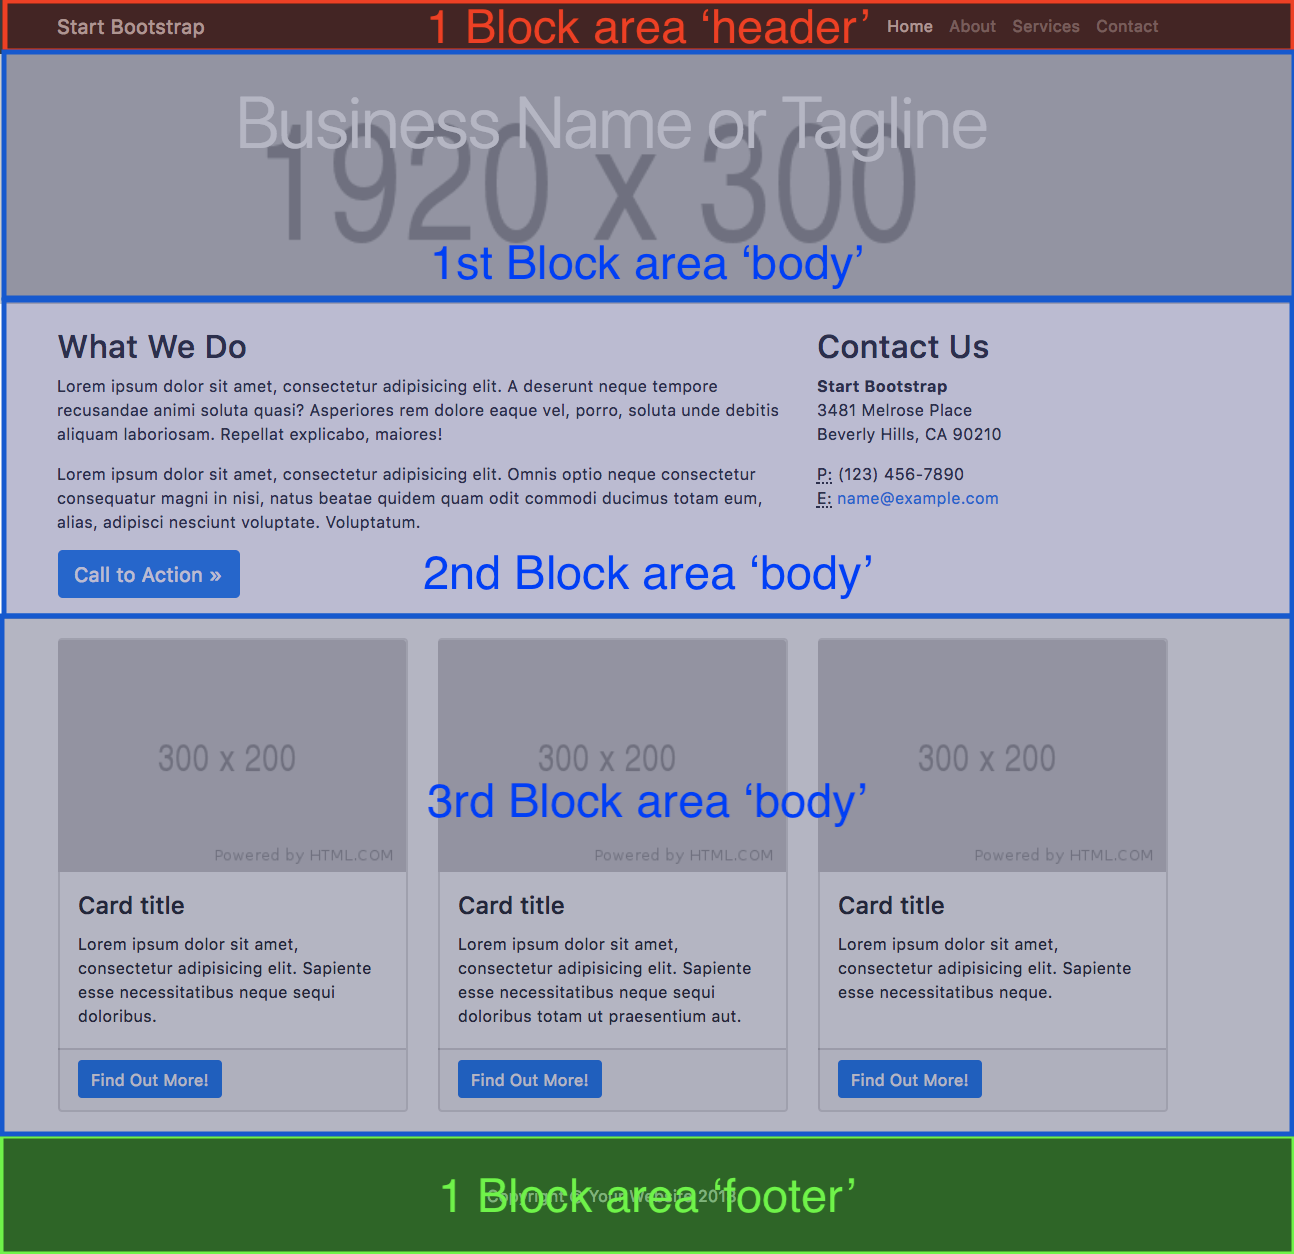
1 block in the header, another one in the footer, and 3 different block in the body.
Creating the single column template layout
If we look at the bootstrap template index.html file, there is just a <div class="container"> containing multiples row.
This single column template will be our default template.
This template has 3 area: a header, a body and a footer.
We can create a file template/layout/default.html.twig extending the base.html.twig and redefining the {% block body %}.
(file template/layout/default.html.twig already exist in skeleton. Update it.)
More information on the cms_area and what is the _global page
{% extends 'base.html.twig' %}

{% block body %}
    <!-- will add here the opera block of this page of the area 'header' -->
    {{ cms_area('header') }} <!-- block from the _global page -->
    {{ cms_area('header', _opera_page) }} <!-- block from the current page -->
    <div class="container">
        <!-- will add here the opera block of this page of the area 'body' -->
        {{ cms_area('body', _opera_page) }}
    </div>
    {{ cms_area('footer', _opera_page) }}
    {{ cms_area('footer') }}
{% endblock %}
As said in the Layout documentation we need to add a database entry for this layout.
Add an entry to your Layout fixture src/DataFixtures/LayoutFixtures.php
(Already exist in skeleton)
// src/DataFixtures/LayoutFixtures.php

class LayoutFixtures extends Fixture
{
    const LAYOUT_DEFAULT = 'LAYOUT_DEFAULT';

    public function load(ObjectManager $manager)
    {
        $layout = new Layout();
        $layout->setName('default'); // name of the .html.twig
        $layout->setConfiguration([
            'areas' => [ // names of the differents area of this template layout
                'H' => 'header',
                'B' => 'body',
                'F' => 'footer',
            ],
            'layout' => [ // visual representation of the layout
                'H H H H',
                'B B B B',
                'B B B B',
                'F F F F',
            ]
        ]);
        $manager->persist($layout);
        $this->addReference(self::LAYOUT_DEFAULT, $layout);

        $manager->flush();
    }
Second layout: two columns layout
Splitting the second layout into area
If we take our second layout:
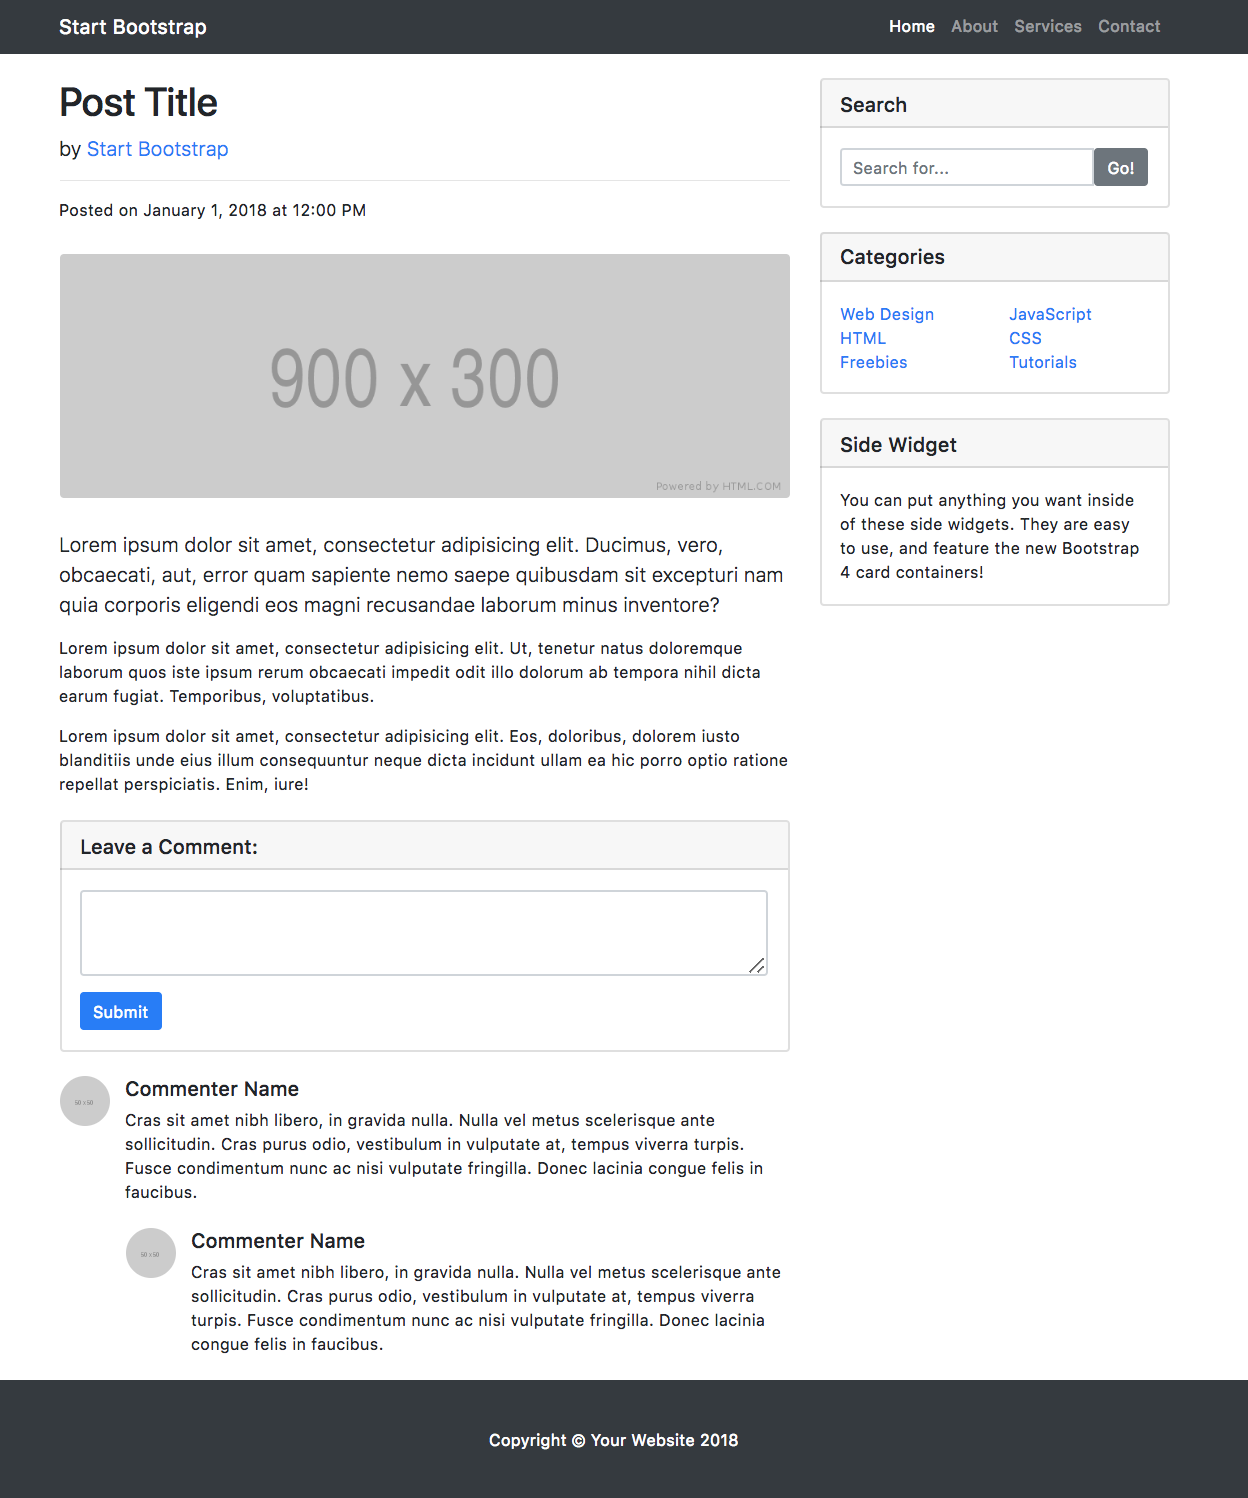
We can divide the layout into four different area header, body, sidebar, footer:
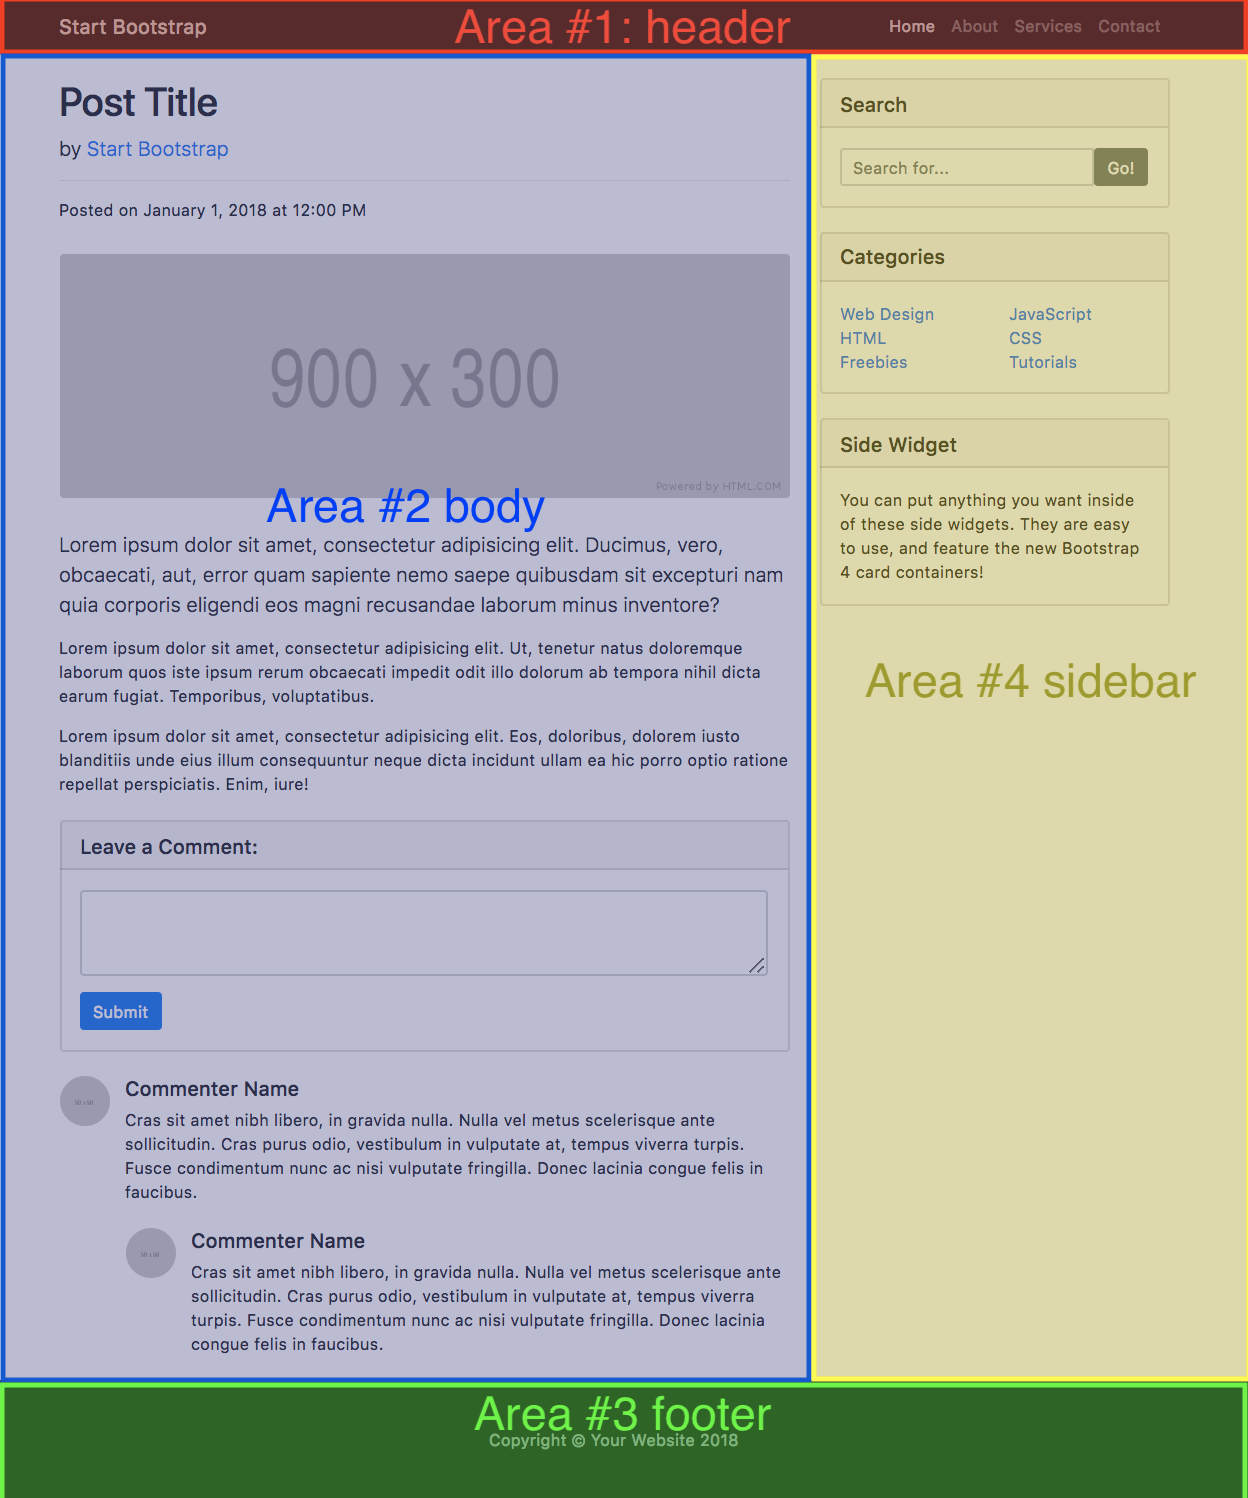
With each area having various blocks:
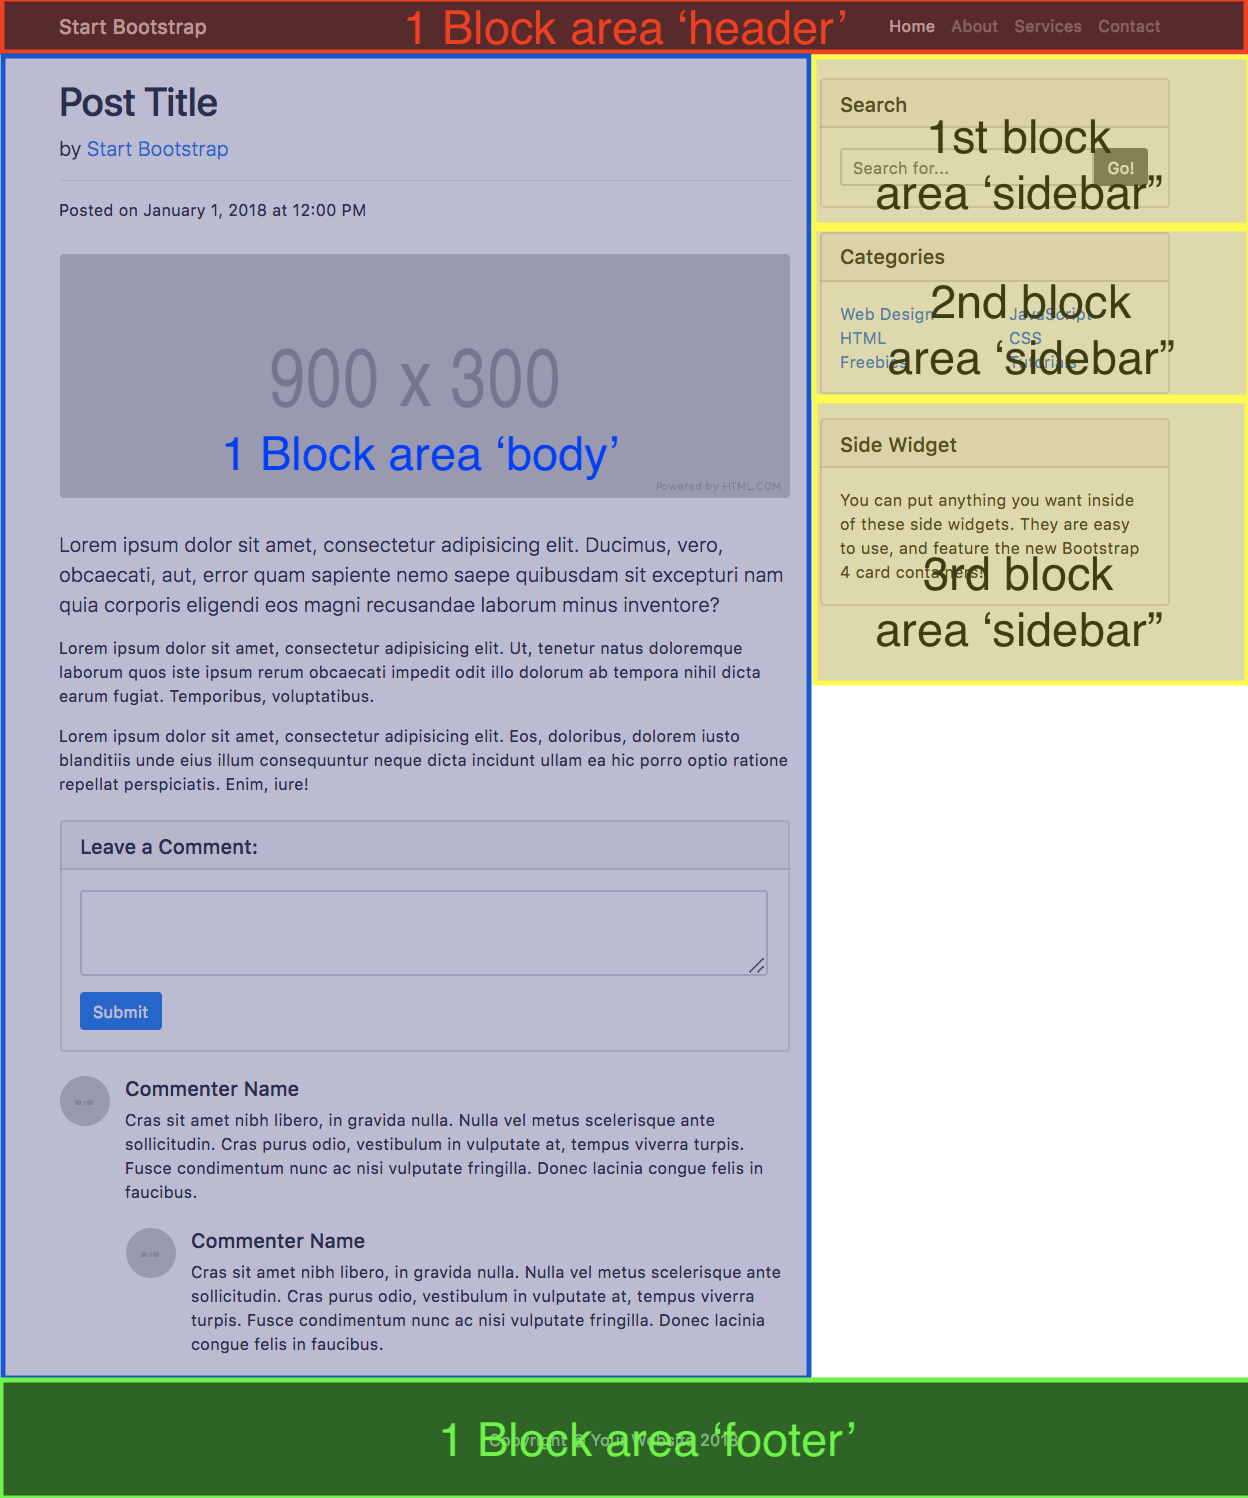
1 block in the header, another one in the footer, 3 in the sidebar and 1 in the body.
You can define the blocks as you wish. For instance the post block in the body could be splitted into 2 block one the content of the post and one for the users’ comments.
Exemple alternate block split:
Creating the two column template layout
If we look at the bootstrap template index2.html file, there is just a <div class="container"> containing one row with two column.
We can create a template/layout/two-columns.html.twig file. It look a lot like the default.html.twig with an header and body area but with one extra area: sidebar
{% extends 'base.html.twig' %}

{% block body %}
    <!-- will add here the opera block of this page of the area 'header' -->
    {{ cms_area('header') }} <!-- block from the _global page -->
    {{ cms_area('header', _opera_page) }} <!-- block from the current page -->
    <div class="container">
        <div class="col-lg-8">
            <!-- will add here the opera block of this page of the area 'body' -->
            {{ cms_area('body', _opera_page) }}
        </div>
        <div class="col-md-4">
            <!-- will add here the opera block of this page of the area 'sidebar' -->
            {{ cms_area('sidebar', _opera_page) }}
        </div>
    </div>
{% endblock %}
And the associated database entry just after the default one:
// src/DataFixtures/LayoutFixtures.php
const LAYOUT_TWO_COL = 'LAYOUT_TWO_COL';

$layout = new Layout();
$layout->setName('two-columns'); // name of the .html.twig
$layout->setConfiguration([
    'areas' => [ // names of the differents area of this template layout
        'H' => 'header',
        'B' => 'body',
        'S' => 'sidebar',
    ],
    'layout' => [ // visual representation of the layout
        'H H H S',
        'B B B S',
        'B B B S',
    ]
]);
$manager->persist($layout);
$this->addReference(self::LAYOUT_TWO_COL, $layout);

$manager->flush();
Loading layout fixtures and try out in admin
You can create your home page that will use the default layout and a exemple page that will use the two columns
// src/DataFixtures/PageFixtures.php
const PAGE_HOME = 'PAGE_HOME';
const PAGE_POST = 'PAGE_POST';

$page = new Page();
$page->setTitle('Hello home sweet home');
$page->setSlug('');
$page->setStatus('published');
$page->setLayout($this->getReference(LayoutFixtures::LAYOUT_DEFAULT));
$this->addReference(self::PAGE_HOME, $page);
$manager->persist($page);

$page = new Page();
$page->setTitle('My two column page here');
$page->setSlug('exemple-page');
$page->setStatus('published');
$page->setLayout($this->getReference(LayoutFixtures::LAYOUT_TWO_COL));
$this->addReference(self::PAGE_POST, $page);
$manager->persist($page);
Then executing the make rebuild command, you load the layout fixtures in your database. You can now go on your admin page http://localhost:8000/admin using cedric as username and demo as password and create other pages using these layout.
You will now have a home page using the default one column layout http://localhost:8000/. And a exemple page using the two column layout http://localhost:8000/exemple-page
Wait… what ?! But my pages are empty !
Of course. We need to add our famous opera blocks ;)
Add some block in the admin
For this part of the guide. We will not code new block but use twig type block (see documentation). It allows to add the content of your code directly in the block.
In the admin http://localhost:8000/admin using cedric as username and demo as password you can edit a page layout to add blocks.
Blocks for a specific page
Go on the Layout page of Home
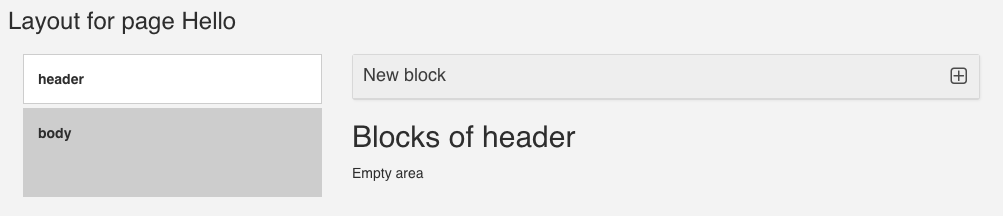 Edit the layout page Home
Add a twig block
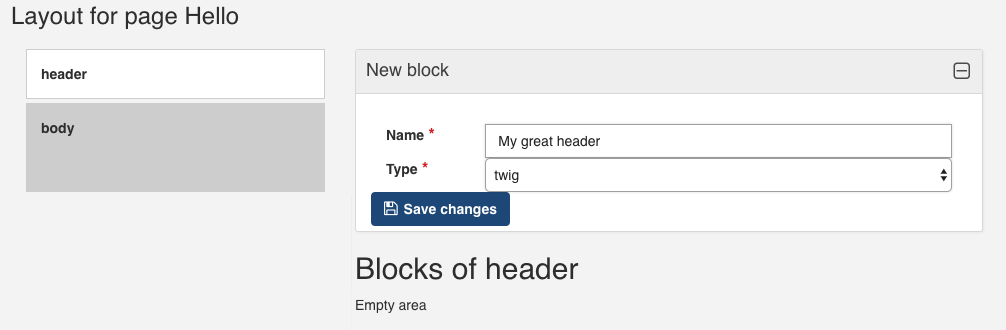 Add a block
 twig on the area header
Edit the code of the block
 Add the content of your block
Here I used the first <div class='row'> of the index.html of the bootstrap template
Repeat on the other area as needed
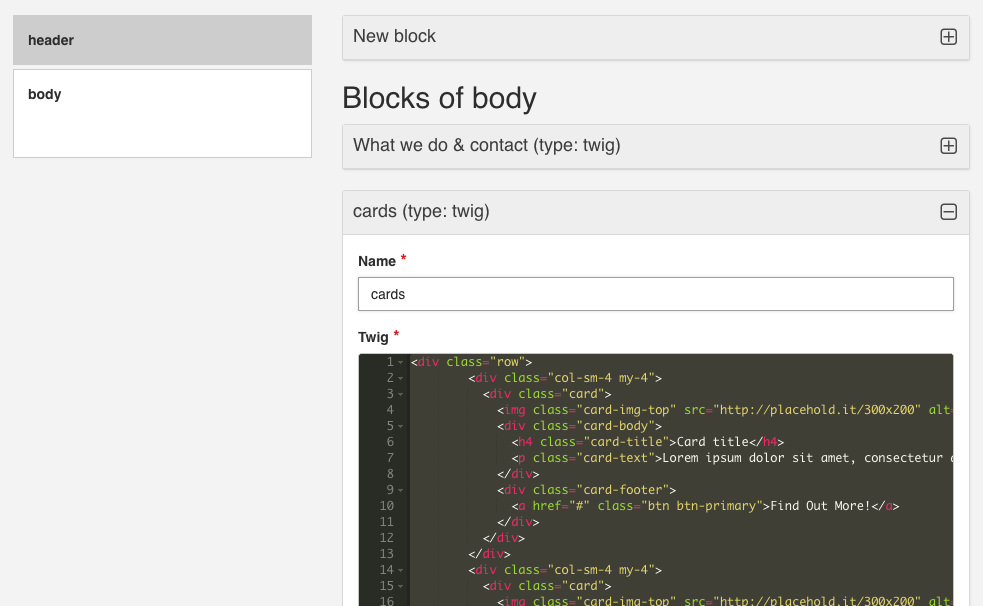 Ex: I added two blocks in area
 body
Repeat the process on all the area and pages as needed.
Blocks of the _GLOBAL page (common blocks)
In your admin you will have a page named _global that`s a special page that have all the common blocks that are used on all the page (menu, footer…) so you don’t have to configure them on all the pages.
Add your common items on this page. (that would be a nav menu block in the header area, and a copyright block in the footer, area) They will be available on all your pages.
Here, your pages are no longer blank \o/.
It looks just like the bootstrap exemple and can be easily be edited in the admin.
Next steps
- Step-by-step Guide: Create a ‘Post’ Entity and it related pages (incomming)
- Doc: create your own entities